How to Use a Squat Rack? (Complete Guide)
The squat rack is a deserving and imposing centerpiece of most fitness settings, from commercial and home gyms to competitive powerlifting meets. Leg days owe their bad rap to the brutal effectiveness of squat racks. Seeing people hoisting hundreds of pounds overhead might be a fascinating and fearsome sight.
It can make your initial steps into the giant metal frame all the more daunting. Don’t worry; we’ve put together this one-stop guide on how to use a squat rack like a champ.
How to use a squat rack? – Using a squat rack for beginners can be intimidating. First, adjust j-hooks and safeties. Second, load the barbell. Third, get into the position. ACTION!!! Finally, return the barbell to the rack, pat on your back, and relish the herculean act.
What is a Squat Rack?
If you’re a complete beginner, the vast diversity of racks will throw you off. It’s an umbrella term for a whole class of training platforms. Power cages, rigs, half racks, squat stands, and wall-mounted foldable ones are all included.
Any form of a workout station that holds a barbell during working sets can be called a squat rack colloquially. The defining feature is this: it has two or more uprights with thru-holes (for attachments) and two independent or a C-shaped linked base. The columns may be made of 2”x2” or 3”x3” steel tubes.
J-cups are barbell holders and, thus, a mandatory add-on. You can customize their height depending on the exercise. For example, you’ll need them around your shoulders for squats but at your knees during rack pulls and bent-over rows. Other parts of a squat rack include a pull-up bar, safety pins/straps, spotter arms, weight pegs, dip bars, and various hooks for band and landmine exercises.
What Exercises Can You Do with a Squat Rack?
The squat – front, back, overhead, or split – is, of course, the most frequent movement. But that’s the tip of the iceberg! You can do bicep curls, barbell lunges, inverted rows, and shrugs. You can haul a weight bench for squeezing in a few pressing sets for your chest, shoulders, and triceps. The squat rack is the most sought-after equipment, warranting separate deadlift platforms.
But performing deadlifts in a rack isn’t entirely unheard of. You can tie a resistance band or suspension trainer across the pillar for multiple strength and stretching exercises. Some power racks can also take a cable and pulley system, opening up infinite opportunities. Don’t forget the top cross-beam, which challenges you to do pull-ups, leg raises, and other calisthenic feats.
In short, the versatility of a squat rack is only limited to your imagination.
3 Benefits of Using a Squat Rack
In many cases, the ‘why’ precedes the ‘how.’ A squat rack is a big investment. You might wonder if purchasing and knowing how to use a power rack is worth it. A spoiler: it totally is! Let’s look at the impending upsides to your weight training.
✅ Safety
Weightlifting injuries occur due to dropping or using heavier weights. The accident rate is higher among younger athletes. Thanks to the attached safeties, you can bail anytime in a squat rack. Even when failing a bench press, they secure the weight before it could crush your ribs. NSCA also suggests using a power rack or getting hold of spotters.
✅ Effectiveness
Think about having to clean the bar before each squatting or pressing set. Training in a squat rack is safe and efficient. The loaded bar is received and retrieved whenever, wherever you want – letting you focus on target muscle groups (and not cluttering the space as a bonus). Having safety backups also motivates you to train harder.
✅ Convenience
Work safe, simple, and solo! A squat rack has a modular construction. Upright columns have rows of holes, usually spaced 1” apart. These holes accommodate multiple adjustments and attachments, making up a do-it-all functional trainer. It’s a valuable garage gym piece, too. Some even collapse to empty the floor when not in use.
How to Use a Squat Rack Correctly?
Imagine finding an unoccupied squat rack with no wait line. What else could spoil your fortune apart from ignorance? You must know proper squat rack form, bar placement, adjustment options, and relevant etiquette.
Don’t overwhelm yourself; we’re here for a detailed discussion! Once you understand the uses and settings of all bells and whistles, you can do all squat rack exercises. We’ll take the good old barbell back squats as an example here.
1. Setup
Everyone is built differently. You’ll have to adjust the rack attachments accordingly. So, how to set up a squat rack?
First, get j-cups ready to switch positions by stripping them of all weight. These are small hooks that actually hold the barbell. You need them at a perfect height. For squats, it’s slightly below your shoulders, so you can lift the barbell without tiptoeing. Newer J-hooks don’t need a screwdriver. Just twist them up and take them out! Similarly, insert the pin in another notch and flip down.
Afterward, place the safeties at the end range of motion. If you can’t muster the strength out of the hole, drop the weight safely!
The traditional pin-and-pipe system is found in a power cage with a cubicle shape and four uprights. You squat inside it. These pins connect fore and hind posts. Straps are less noisy alternatives with a similar mechanism. Spotter arms, on the other hand, are situated under J-cups on the outside. Adjustments are a breeze. Make sure you’re fitting each pair of attachments at the same level.
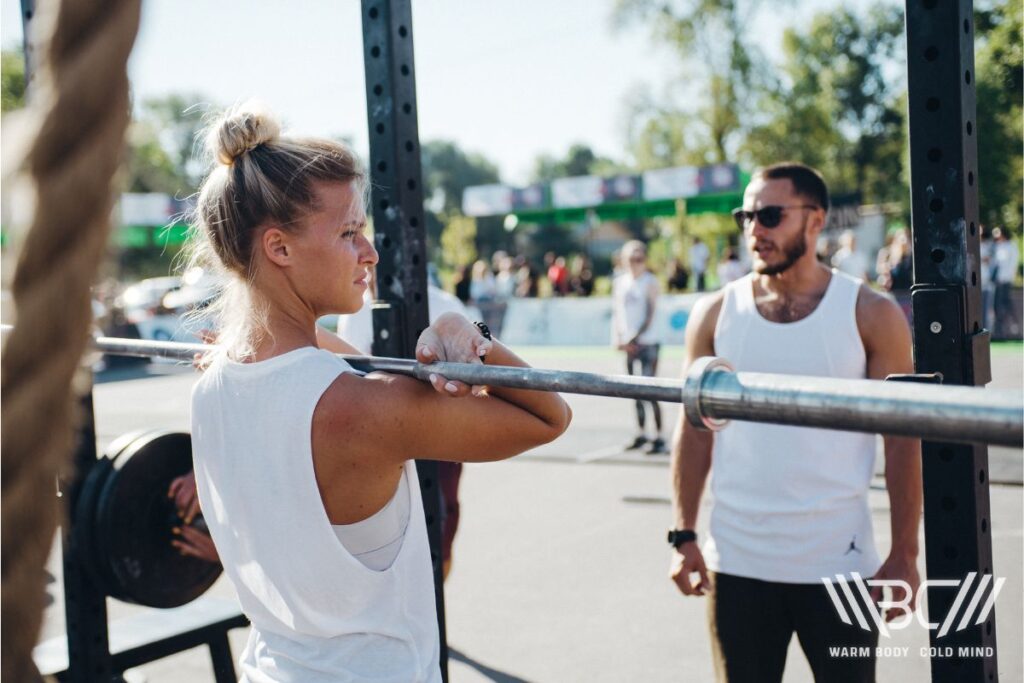
2. Load
Once everything is set, put the barbell right back up. You should grab it from a distance with your outstretched arms parallel to the floor. It will strike the middle of your sternum as you approach closer. The bar should be centered as well. Take a shoulder-width grip and get under it, ensuring the center knurl is evenly spread across your back.
It’s time to log the weight. You’ll find plates on a rack or nearby stand. Never overburden one end of the bar if you log multiple plates on each sleeve. Otherwise, the weighted side could fly off the rack. The same is true for unloading.
If you’re in a commercial gym at peak hours, don’t hog the equipment for too long. Also, don’t leave the barbell loaded after finishing your sets. Put all things back in their place.
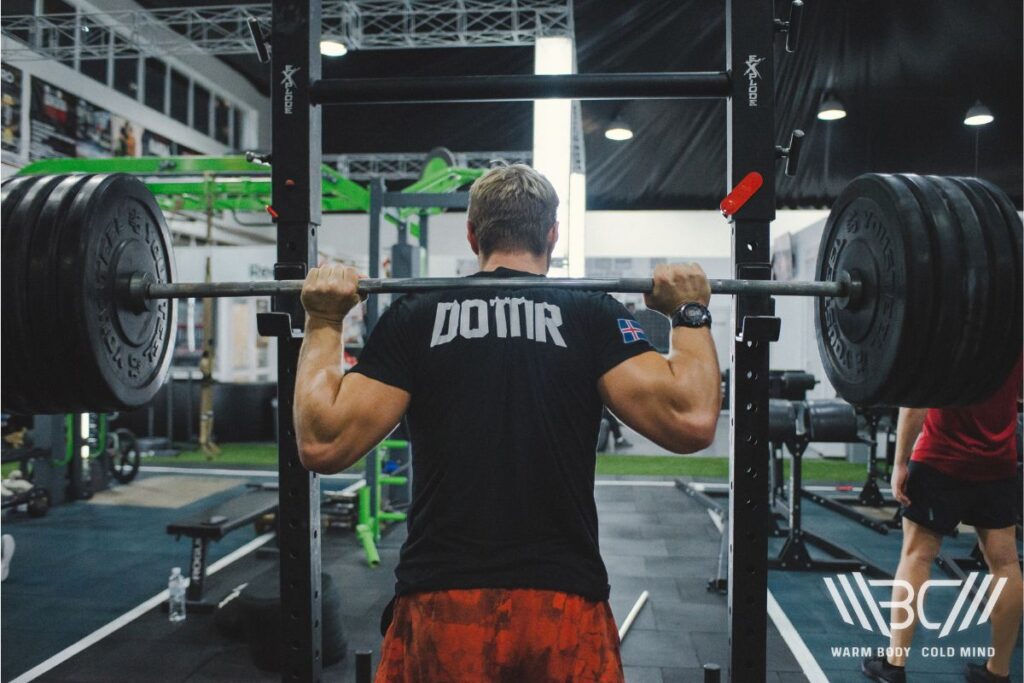
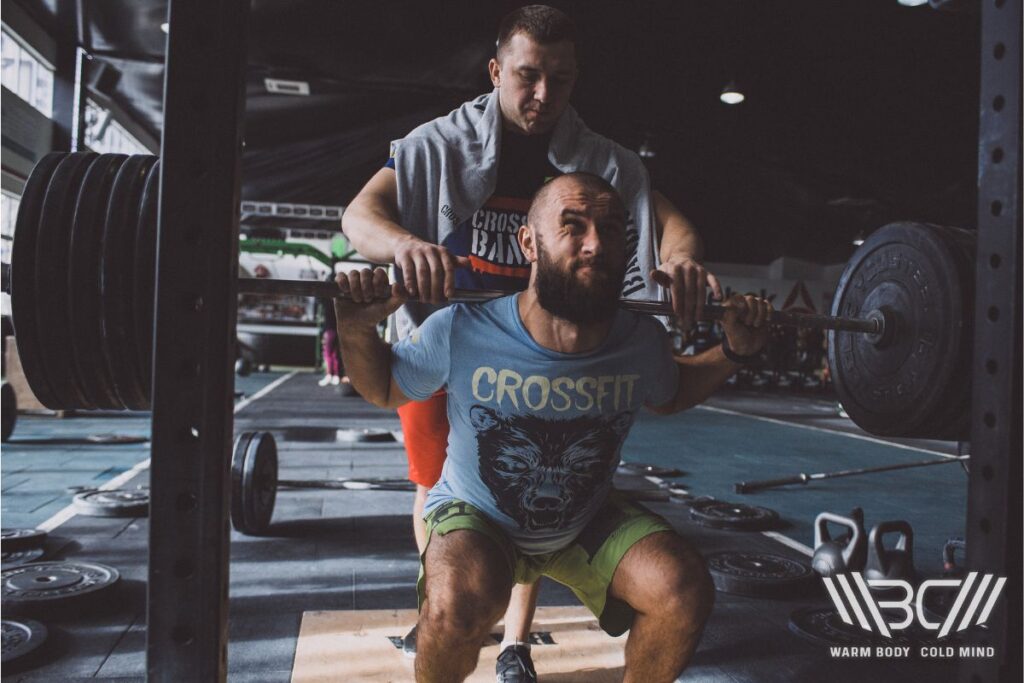
3. Position
Take a deep breath. Engage your core muscles. And slide under the bar. Squeeze your shoulder blades to pop up a muscular shelf. Make a firm grip with neutral wrists.
You can opt for a high or low back squat variation, with the bar placed on traps or rear delts. In any squat rack position, keep your neck free and packed.
Now, stand up and take the bar off the rack. Maintain the ground contact and balance. Take a couple of steps back to rule out any chance of collision. Your stance established, bar stabilized, abs braced, elbows tucked in, and chest lifted – it’s time to sit deep into a squat.
Pro Tip:
Barbell foam pads seem helpful during initial back squat attempts inside a rack, protecting your back from scuffs and slips. However, avoid using wrist straps and safety bars.
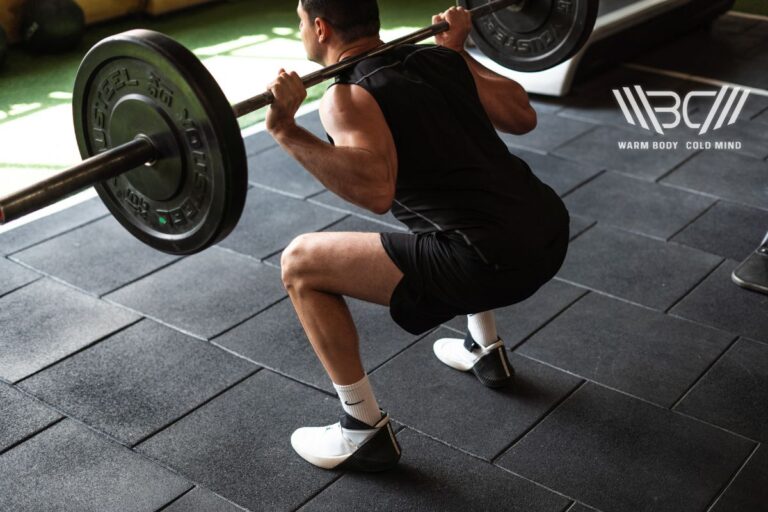
4. Squat
Throughout the movement, your spine must remain neutral. Don’t rush (read: dive-bomb) the descent. Breathe on the way down; exhale while rising. The bar balanced on the back must fall in the line of your midfoot, with your whole foot planted on the ground. Coming on your heels or toes kills the form.
Brad Schoenfeld (2010) exquisitely compiled squat biomechanics. A good cue to remember is that the movement is entirely vertical. No back-and-forth or side-to-side motion is involved. Your knees must track over your toes – no caving in whatsoever!
For maximum quad and glute activation, a significant depth – no less than parallel to the floor – must be reached. If you can’t access enough depth, revise basics with decreased load and/or volume.
Pro Tip:
A subpar execution doesn’t always imply an inherently faulty technique. You may lack adequate mobility in your ankles, hips, thoracic spine, or shoulder external rotation.
5. Finish
Once you’ve completed your reps, rewind the unracking and positioning process. Take a few steps forward, get over j-cups, lower yourself while gripping the bar until it’s rested, and duck out. All’s well that ends well!
If you won’t be doing more sets, unload the barbell. Leave j-cups and safeties as they are. In case you’re taking a break, allow others to share the power rack.
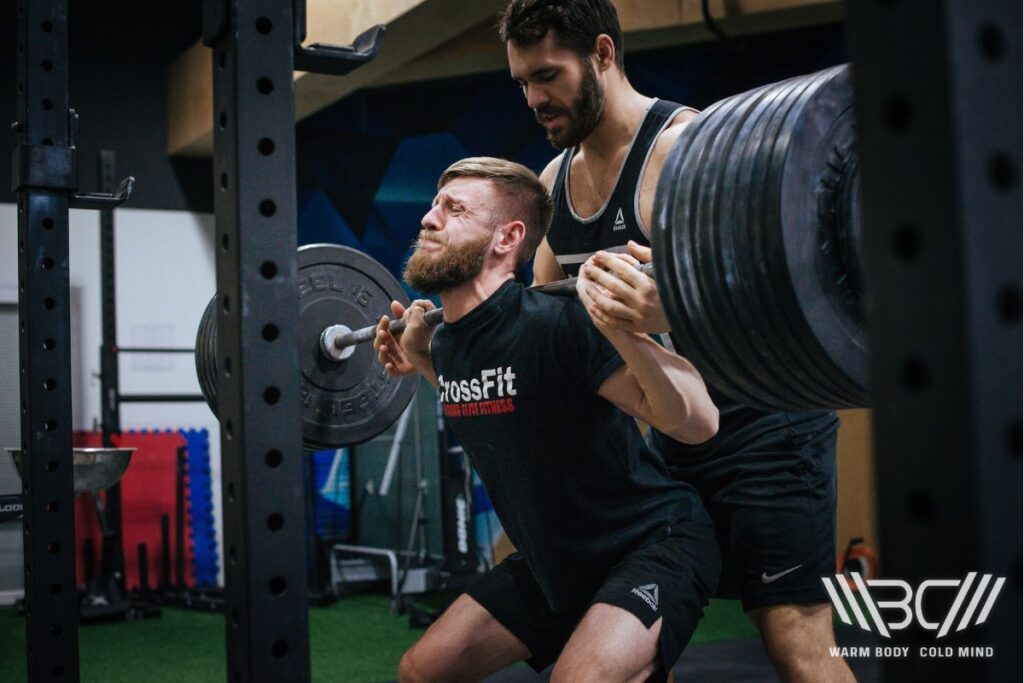
What if you want to bail in the middle? No problem if you have correctly positioned spotter arms! Ideally, they should neither touch the bar during normal reps nor stay too low to make any difference during failed attempts. It’s easy to make it work out if you cognize your depth range.
Never compromise spinal form, even when releasing the bar behind your back. Excessive rounding of the back is a common functional deficit, which can be proven disastrous when bailing out. If there are no spotters in place, you can drop weights on the ground, but inquire about the gym policy on the matter.
6 Main Mistakes when Using a Squat Rack
A few errors in handling a squat rack for beginners are repeatedly noticed, some with grave consequences. These are different from technique and overloading issues intermediate athletes encounter once they get accustomed to the ins and outs of equipment.
1. Not Double-Checking the Weight
Always ensure that the weight is equally distributed on both sides. Bumpers are all of the same width, and mistakes can happen. Also, log the heaviest plate first.
2. Not Using Clamp Collars
Barbell collars and clips secure weight plates onto the sleeve. Otherwise, during the exercise, plates might slide and mess up your balance if not butted together.
3. Not Clearing out the Surroundings
Clearing the space is a part of how to set up a squat rack. You’ll get slightly away from the rack to exercise, and the last thing you want is a box or bag lying around.
4. Not Being Mindful of Safety Arms
Squat rack amateurs wander too far back to be within the coverage of spotter arms. Remember, only two to three small steps are required to clear the front.
5. Not Asking for a Spotter
Safety parts of a squat rack replace only one (though the most important) task of a helper. You’ll still need an experienced person for feedback and guidance.
6. Not Warming Up Enough
Adequate warm-up improves exercise performance and safety. Besides ramp-up squat sets, do adequate stretches and accessories before plunging into the rack.
Our Squat Rack Recommendation
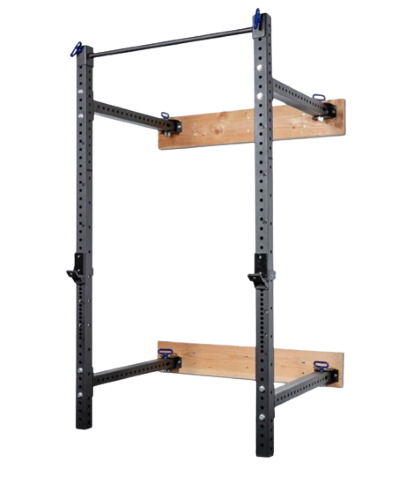
REP PR-4100 Folding Squat Rack is a minimalist and affordable training station for your home gym. It allows pinpointed bar height, collapsible wall-mounted storage, up to 1000 lb weight capacity, and two depth (21” and 41”) options. J-cups and a straight pull-up bar are included. You can further add spotter arms, dip bars, and landmine attachments to the package.
FAQ
How to Use a Squat Rack for Bench Press?
Using a squat rack for a bench press has no fuss and frills. Drag the bench. Insert j-cups low on back posts if you’re using a cubicle power rack. Carefully place safety pins a little above your chest level.
Can I Squat Without a Squat Rack?
You can do fine without a squat rack for some time. However, maneuvering bulky loads to an optimal squat position is a difficult and dangerous task, not to say a needless one! A rack simplifies positioning yourself and the equipment.
Do You Face Toward or Away From the Squat Rack?
Facing forward toward the rack is generally advisable. This way, you can see j-cups, safeties, and distance from the rack itself. Racking the bar at the end of your set while facing away is more like driving in a blind spot.
Is It Okay to Use the Squat Rack for Other Exercises?
Yes, squat stands facilitate an array of strength exercises. Be in it as long as you want if there’s nobody around, but that won’t always be the case. Leave the rack for exercises that can be performed without it, such as deadlifts and hip thrusts.
Conclusion
A squat rack is, arguably, the most versatile and valuable piece of gym equipment ever envisioned, chased by athletes of all cadres and categories. It lends unparalleled safety and efficiency to your weight training. Acing it is the ultimate commitment trial for rookies.
How to use a squat rack? The question, from the outside, seems a tough nut to crack but squishes like a banana. Still, the first encounter can be intimidating without prior knowledge, which, hopefully, you now possess. Share your first experience with using a squat rack. Who helped you navigate the intimidating territory? We’re all ears in the comment section.
References:
- Brad J. Schoenfeld, “Squatting Kinematics and Kinetics and Their Application to Exercise Performance,” Journal of Strength and Conditioning Research 24, no. 12 (2010):3497-3506.
- Daniel Glassbrook, Scott R. Brown, Eric R. Helms, Scott Duncan, Adam Storey, “The High-Bar and Low-Bar Back-Squats: A Biomechanical Analysis,” Journal of Strength and Conditioning Research 33 (2017):1-18.
- Fradkin Andrea J., Zazryn Tsharni R., Smoliga James M., “Effects of Warming-up on Physical Performance: A Systematic Review With Meta-analysis,” J Strength Cond Res 24, no. 1 (2010):140-148.
- Gregory D. Myer, Adam M. Kushner, Jensen L. Brent, Brad J. Schoenfeld, Jason Hugentobler, Rhodri S. Lloyd, Al Vermeil, Donald A. Chu, Jason Harbin, Stuart M. McGill, “The Back Squat: A Proposed Assessment of Functional Deficits and Technical Factors that Limit Performance,” Strength Cond J 36, no. 6 (2015):4-27.
- Hamid Mohtasham, Shahin Salehi, “Review on Identifying the Causes and Frequency of Weight-training Injuries and their Prevention Strategies,” J Clin Physio Res 4, no. 1 (2019): 1-8.
- John Garhammer, “Weight Room Safety: Using a Power Rack for Squatting” National Strength and Conditioning Association Journal 13, no. 5 (1991):74-82.
- All photos are made by our WBCM Media team.

Author: Jason Li
Personal Coach | Functional Range Conditioning Mobility Specialist
Jason is an NYC personal training expert and National level Olympic Weightlifting Coach with over 10 years of experience training everyday clients to high levels of performance. He has trained everyone from youth (13 years old and under) to masters (60+ years old) to regional and national rankings for powerlifting, Olympic Weightlifting, Short distance (up to 200m) sprinting, discus & hammer throwing.