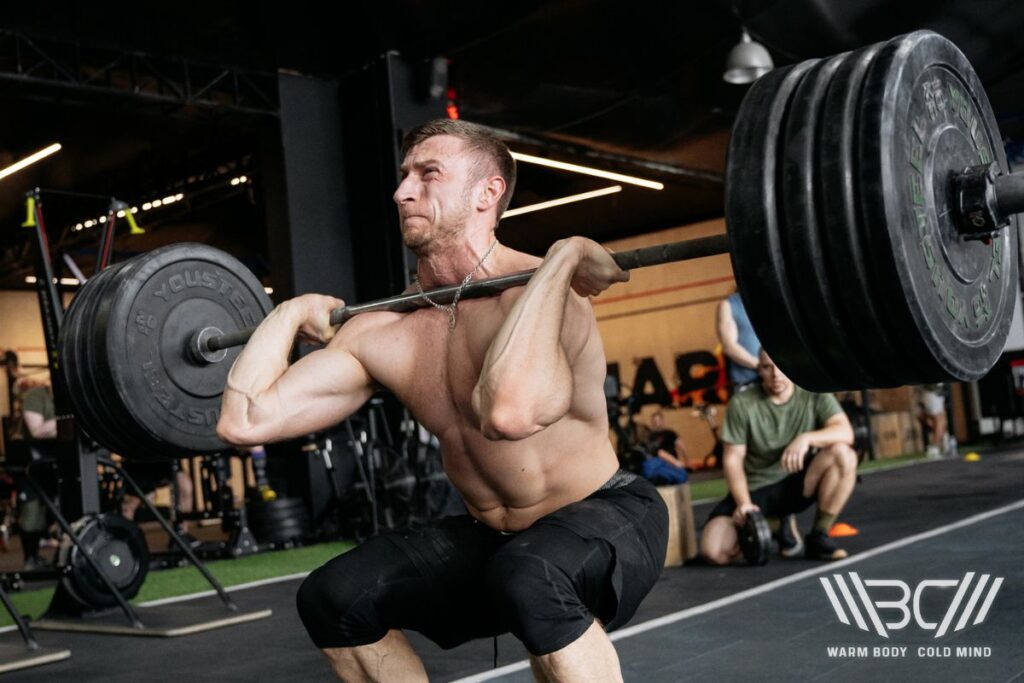
How to Improve Front Rack Mobility for Weightlifting
In this article, we’ll show you how to improve front rack mobility. The front rack, often referred to as “the shelf,” is a position in weightlifting where the barbell is held across the front of the shoulders and collarbone with the elbows raised and pointing forward.
Insufficient mobility in the wrists, elbows, shoulders, and back can all contribute to an uncomfortable and unstable front rack, making popular exercises such as front squats difficult. To make things easier, we’ll break down the proper front rack position into key components, explain how they play off of each other, and how to improve on them individually and holistically.
Front rack mobility is essential for making the shelf between our arms and shoulders, on which we rest the bar in exercises like front squats and cleans. Front rack mobility exercises unlock the range of motion in our wrists, elbows, shoulders, and back through rotation, extension, and flexion.
What Is Front Rack Mobility?
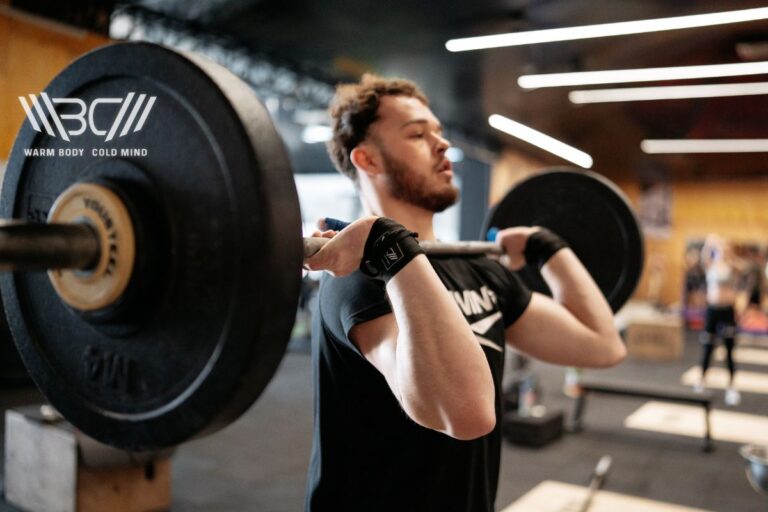
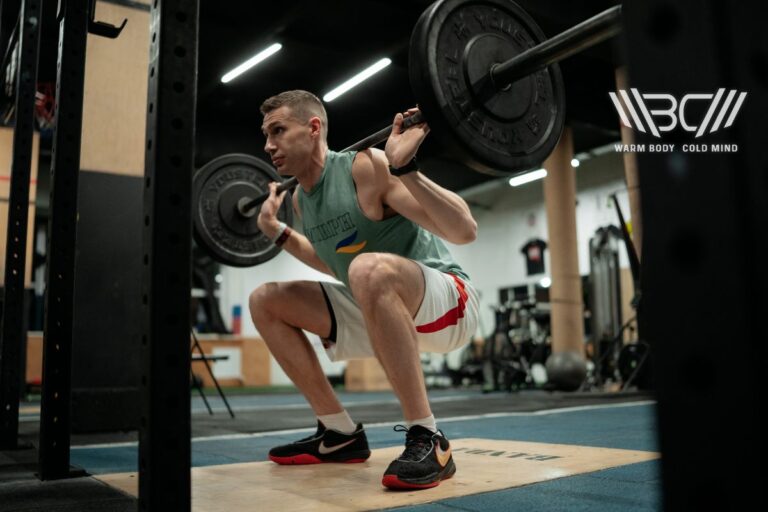
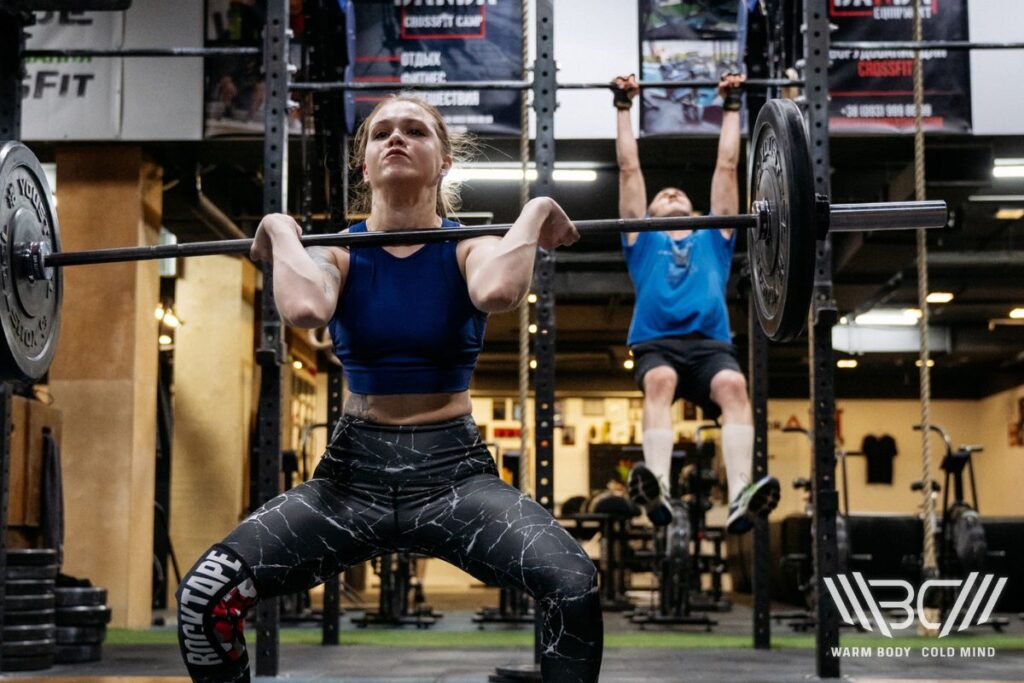
The front rack is a fundamental weightlifting position in which the barbell rests on our shoulders and collar while being supported by the hands. It’s essential for front squats, push presses, clean, and clean & jerk, among similar exercises.
Depending on your experience with similar exercises and personal athletic level, it can be difficult to pick up due to the high demand for upper body mobility and flexibility, particularly in the arms and shoulders. This ability is commonly referred to as front rack mobility.
A common misconception about the front rack position, and where the most common mistakes come from, is that the weight is held up by the hands when this isn’t the case. In fact, many of the exercises that utilize the front rack, the most popular arguably being the front squat, do not use hands to generate power at all.
Instead, the hands are only there to balance the barbell and guide its trajectory while it rests on the so-called shelf created between the arms and shoulders. In other words, at no point during the exercise is the weight held in the hands. That said, the role of the hands is crucial for safety and stability throughout the movement.
The 6 Front Rack Mobility Components
When we teach weightlifting, we break down the front rack position into six key components for easier understanding. Knowing which body parts are engaged is crucial for a properly aligned and stable front rack. Here’s what it looks like starting from the top:
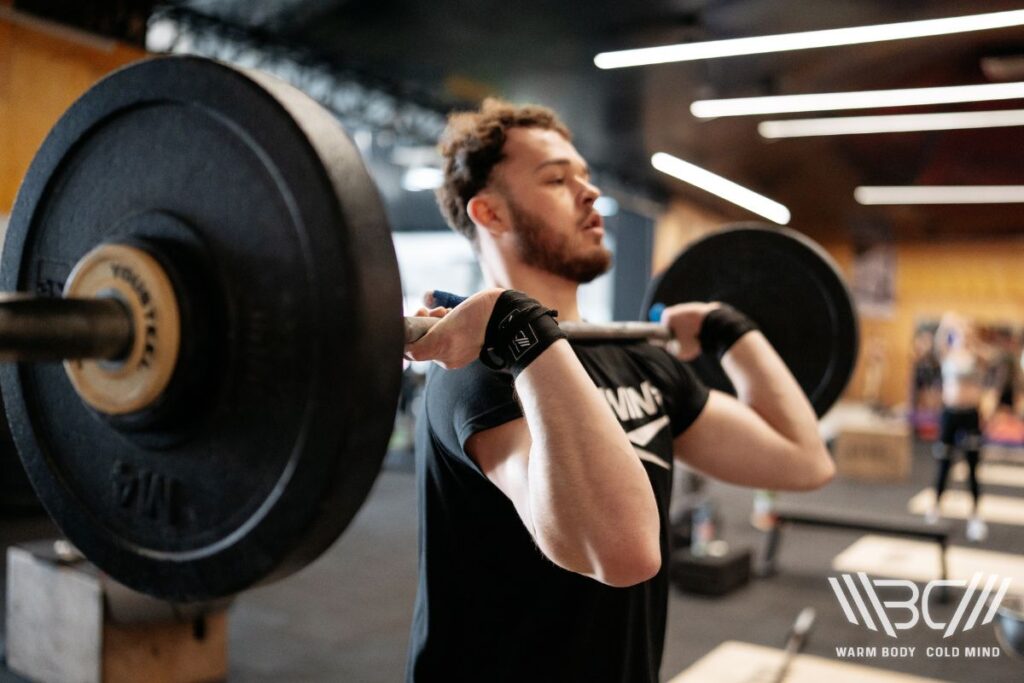
1. Wrist Flexibility
Our wrists have to be flexible enough to comfortably rotate around the barbell for successfully completing many weightlifting exercises. This is especially true if you enter the front rack position from the floor, AKA the Clean. When balancing the barbell in the front rack position, the wrist is bent back in on itself, also known as wrist extension.
If our wrists aren’t flexible enough to bend back comfortably there will be a high degree of pressure that will feel uncomfortable or even painful. Placing the barbell weight on an inadequately extended wrist could result in excessive strain on the tendons and ligaments, increasing the risk of injury such as wrist tendonitis or ligament sprains.
2. Elbow Flexion
The key to holding a proper front rack position is keeping the elbows up and vertical to the ground. Now, multiple muscle groups work toward that goal, including our arms, shoulders, and upper back. However, all of that doesn’t matter if we can’t comfortably flex the elbow to touch our shoulder with the wrist. You must be able to collapse the arm at the elbow to comfortably raise the elbows up when holding the barbell.
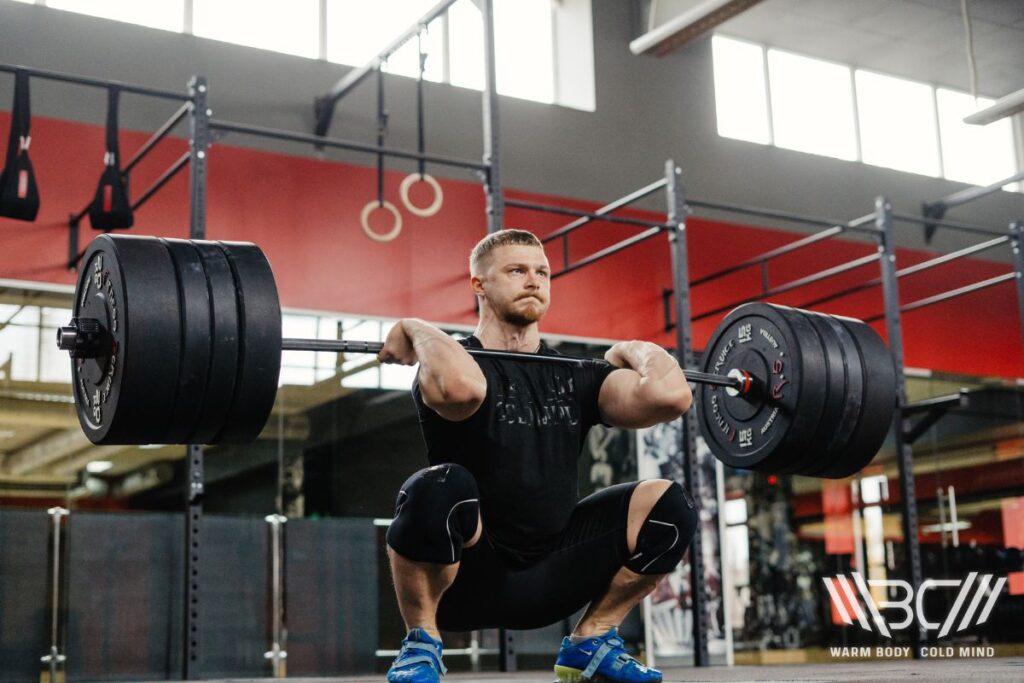
3. Shoulder Rotation
Unlocked shoulder rotation is arguably the most important component of front squat mobility. The two key components here are shoulder protraction and elevation. Protraction refers to the shoulder’s ability to rotate forward and away from the spine.
Shoulder protraction is necessary for creating the “shelf” between the shoulders and collarbone on which the barbell rests in a proper front rack position. Shoulder elevation is the ability to rotate the shoulder up, which raises our elbows. Once protracted, the shoulder must be able to rotate upward so that it keeps our elbows at a minimum parallel to the ground, but preferably pointing slightly higher.
4. T-spine Extension
The Thoracic Vertebrae AKA the Thoracic spine or simply T-spine is the longest part of the spine consisting of 12 vertebrae (named T1-T12) to which our rib cage is attached. Being able to extend the T-spine is essential for maintaining an upright torso and straight upper back.
Limited T-spine extension will result in rounding at the back when the shoulders rotate inward in the front rack position. It goes without saying that a rounded back during weightlifting is dangerous for multiple reasons, from instability to uneven spinal load.
5. Lat Flexibility
The Latissimus Dorsi, often simply called the Lat or Lats (plural) is the largest muscle in our back and connects from the hip all the way to the beginning of our arms. It is essential for a wide number of shoulder and arm movements that start from the back (think pushing or pulling). Tight lats can completely limit all of the above-mentioned factors necessary to facilitate a proper front rack position (minus wrist flexibility).
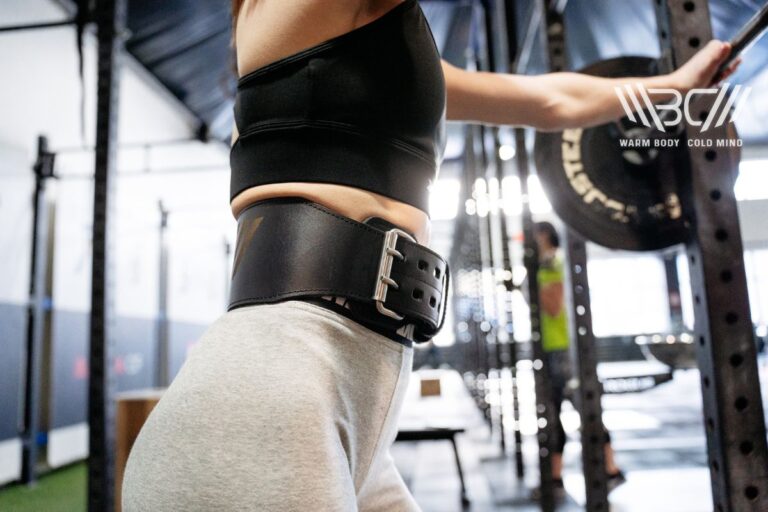
6. Core Strength
Core strength is essential for maintaining an upright torso and straight back and preventing the spine from collapsing forward. The core is most commonly defined as a group of six muscles which include the rectus abdominis, the internal and external oblique, the transversus abdominis, the lumbar multifidus, and the erector spinae.
During free weight exercises such as front squats, high core muscle activity is seen in the rectus abdominis (commonly called abs), external obliques (side abdomen), and erector spinae (spine muscles).
Subscribe!
The latest reviews of must-have home gym training equipment, apparel, and supplements that will enhance your performance and bring you new results.
How To Test Your Front Rack Mobility?
Testing your front rack mobility is as easy as simply racking an unloaded barbell (or pretty much any long stick) onto your front rack and seeing how it sits. You can even do a couple of squats, for example, to see how they feel. That said, it’s important to know what to look out for.
As a reminder, the bar should be rested on the shelf created by your shoulders and collar and shouldn’t be supported by your hands. That means you shouldn’t feel your arm muscles engaged in carrying the weight itself. The elbows should be rotated upwards and pointing to the front, and the grip should be slightly wider than your shoulders.
The bar should not be sitting in your palms and the pressure of the weight should not be felt in the wrists. Instead, the bar is balanced and led by your fingers, but the actual weight should be rested on your body. The back remains straight, the chest is up, and your gaze is forward, but the shoulders remain inward, and everything remains still.
Pro Tip:
There’s a simple test that tells if your front squat shoulder mobility is good. Once the barbell is mounted on your shoulders and collar, you should be able to fully let go with your hands and it should remain balanced in place, in theory. In practice, it will likely start to roll and fall off, but the point is that you can successfully balance it for a couple of seconds before it drops.
How To Improve Front Rack Mobility?
Now you know what a proper front rack looks like. Next, let’s talk about how to improve front rack mobility. General guidelines on mobility workouts recommend doing exercises at least 2-3 times per week, holding each stretch for 15-30 seconds, with 2-4 repeats depending on comfort level. Here are some stretches to try:
1. Wrist Mobility
Our favorite front rack mobility drills for wrists include:
Wrist flexor and extensor stretch – hold your hand out front and grab the palm from underneath with your other hand, then gently pull the hand back to extend the wrist. Next, grab the hand from the top and pull it down into a flex position. Hold each position for about 15-30 seconds and repeat 2-4 sets.
Wrist circles – the classic warmup exercise everybody should do before working out. Start by rotating your wrists clockwise, then counter-clockwise for about 10-15 turns on each side. Next, hold your hands together by interlocking fingers and proceed to rotate making “8” shapes for about 10-15 turns.
Inverse wrist flexor/extensor w/ wall/floor – extend your arm forward with your palm facing up. Approach a wall/floor/any even surface. Extend/flex your wrist from this position and press the palm against the wall. Use the even surface to gently press against your wrist to apply added pressure. Hold for 15-30 seconds and repeat 2-4 times.
2. Elbow Mobility
Here are some front rack mobility exercises for elbows:
Overhead triceps stretch – bend the arm at the elbow until the wrist touches your shoulder (or as close as possible). Grab the bent arm from underneath with your other hand and raise the elbow above your head. Hold for about 15-30 seconds and repeat 2-4 times for each hand.
Banded elbow stretch – grab a long resistance band with one hand and step on it to stretch it out. Rotate the elbow of the gripping hand inward and up, as if doing a front rack position. Use the other arm (or another even surface) to gently push your elbow up, while the resistance band pulls the hand down in the opposite direction. Hold for 15-30 seconds and repeat 2-4 times for each hand.
Front rack elbow rotations – grab a barbell, PVC pipe, or another long stick and assume the front rack position. Rotate the elbows up and down one after the other. Repeat 2- times with 8-10 reps for each hand.
3. Shoulder Mobility
These are our favorite front squat shoulder mobility drills:
Shoulder dislocations – the essential shoulder warmup drill. Grab a PVC pipe, broomstick, or a long resistance band. Grab it slightly wider than shoulder-width apart. With your arms fully straight, raise the object over your head and behind your back, then bring it back and down to your pelvic area.
Ideally, you should be able to go from touching your pelvis to touching your lower back but start by stretching as far as your shoulder mobility allows. Do 10-15 reps 2-3 sets.
Around the world – the start and end positions for this drill are the same as shoulder dislocations, but the movement is different. Instead of a straight overhead movement, you’re going to rotate the bar around your head by raising and making a circle with one hand, then the other, following an imaginary “8” shape. Also 10-15 reps 2-3 sets.
Rotator cuff stretch with PVC – Take a solid stick such as a PVC pipe or broomstick, grab it with your hand, and place it behind the biceps of said hand. Grab the lower end of the pipe with your other hand and pull it upward until you feel the tension.
Note that you might experience a slight pain in your shoulder from this exercise so don’t stretch beyond that point until you get more comfortable with it. Also 10-15 reps 2-3 sets for each arm.
4. Thoracic Spine Mobility
These front rack stretch drills should help you unlock your upper spine:
Cat-Cow stretch – also known as the cat-dog stretch or pose. Start on the floor on all fours. Alternately arch your back upward (like a cat) and lower it downward (like a cow), focusing on isolating the movement from the spine. Repeat 10-15 times.
Quadruped thoracic rotations – start on the floor on all fours, then sit back with your pelvis. Grab behind your head with one arm, then rotate in and out by raising your elbow and following with your head. Repeat 10-15 times for each side.
Foam roller spine stretch – for this exercise you’ll need a foam roller, but it’s well worth the investment if you don’t have one. Place the roller on the floor and lie with your upper back on it. Raise your hips off the floor and gently roll up and down to massage your back. Do 10-20 rolls depending on your current comfort level.
5. Trapezius Mobility
The traps already get unlocked thanks to the previously mentioned thoracic stretch drills. That said, here are some additional exercises you can do:
Neck stretches – tilt your head to one side aiming to touch the shoulder with your ear. Then, grab overhead with the opposite hand to gently apply pressure, feeling the stretch in your upper back. Hold for about 15-30 seconds on each side, repeat 2-4 sets.
Shoulder shrugs – With your hands next to your sides, isolate your shoulders and shrug them towards your ears. You should feel the back muscles stretching up. You can also do this with light dumbbells for added resistance. Do 10-15 reps 3-4 sets.
Traps foam roll – again, start with the roller on the floor. Place it on your middle back and raise one side of the roller by rotating inward. Roll up and down massaging the back muscles.
Pro Tip:
Mobility and flexibility is not something you achieve overnight. It’s important to incorporate adequate exercises into your regular workout routine to see gradual improvement. Set aside 5-10 minutes before your weightlifting session to stretch and activate your body, as well as do a full stretch workout or massage session at least monthly. Too many people skip this!
How Do I Fix My Front Rack Position?
If you apply the above-mentioned front rack mobility exercises you should see steady improvement and be more comfortable in a front rack position. Here are some additional tips and tools that might help.
1. Practice Weightless
To the observer, weightlifting exercises may seem fairly easy to accomplish as long as you can handle the weight. However, out of all resistance exercises, weightlifting has arguably the most complex movement patterns that have to be practiced regularly and with attention to detail to avoid learning them incorrectly and developing bad habits.
So, it goes without saying that the best way to fix your front rack position is simply practicing. Use a barbell without weight or, if that’s too heavy for you (especially as a beginner), grab another stick you can rotate your arms around (as previously mentioned, PVC pipe, broomstick, etc.)
Pro Tip:
Mirrors at the gym aren’t just for decor, they’re there to give visual feedback. So, practice in front of a mirror whenever possible, you will be surprised by how many small mistakes you will catch if you pay attention.
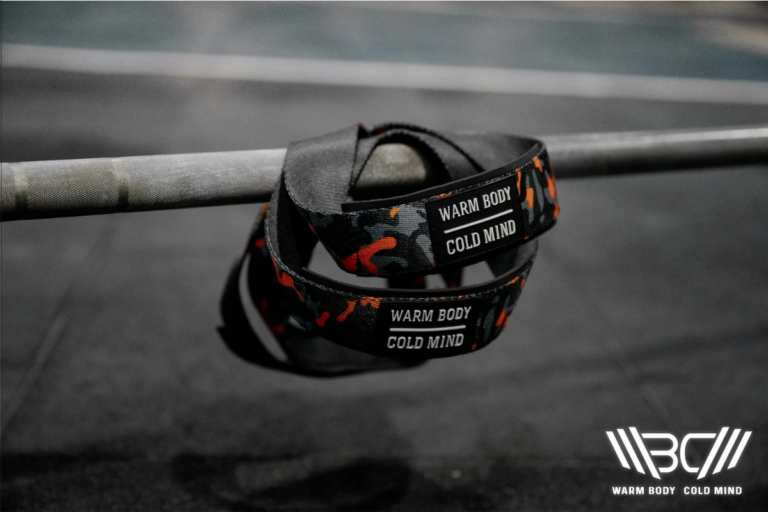
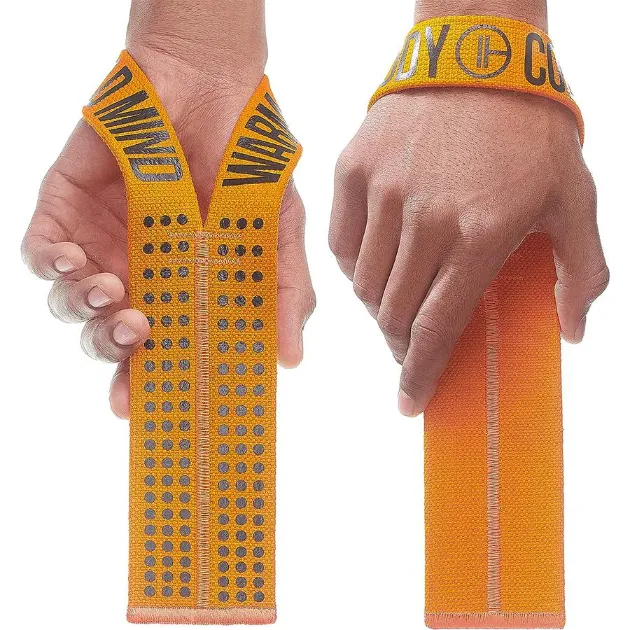
2. Add Wrist Straps
Wrist straps tie your forearms around the barbell, effectively allowing you to let go of it with your hands in a front rack position while still being able to balance and guide it with your arms. If you feel the wrist pressure is too high, these can be a game-changer. We offer two sets of wrist wraps that are excellent for this purpose.
The first is the classic Olympic Weightlifting Straps V1. They’re made from natural cotton, with 33 cm/13” in length leaving more than enough room for multiple wraps. With durable stitching down the middle and a tested 300 kg/660 lbs weight capacity, they’re practically unbreakable.
Olympic Weightlifting Straps V1
Enhance your weightlifting experience with premium Warm Body Cold Mind Olympic lifting straps.
For a tighter wrist fit and easy on/off, we recommend the Weightlifting Straps Lasso Pro. Lasso straps come with a quick adjustable loop that can be set to fit any wrist size perfectly, making them especially popular among athletes with smaller wrists. Also made from the same high-quality cotton and tested up to 370 kg/815 lbs capacity, they’re perfect for any type of lift.
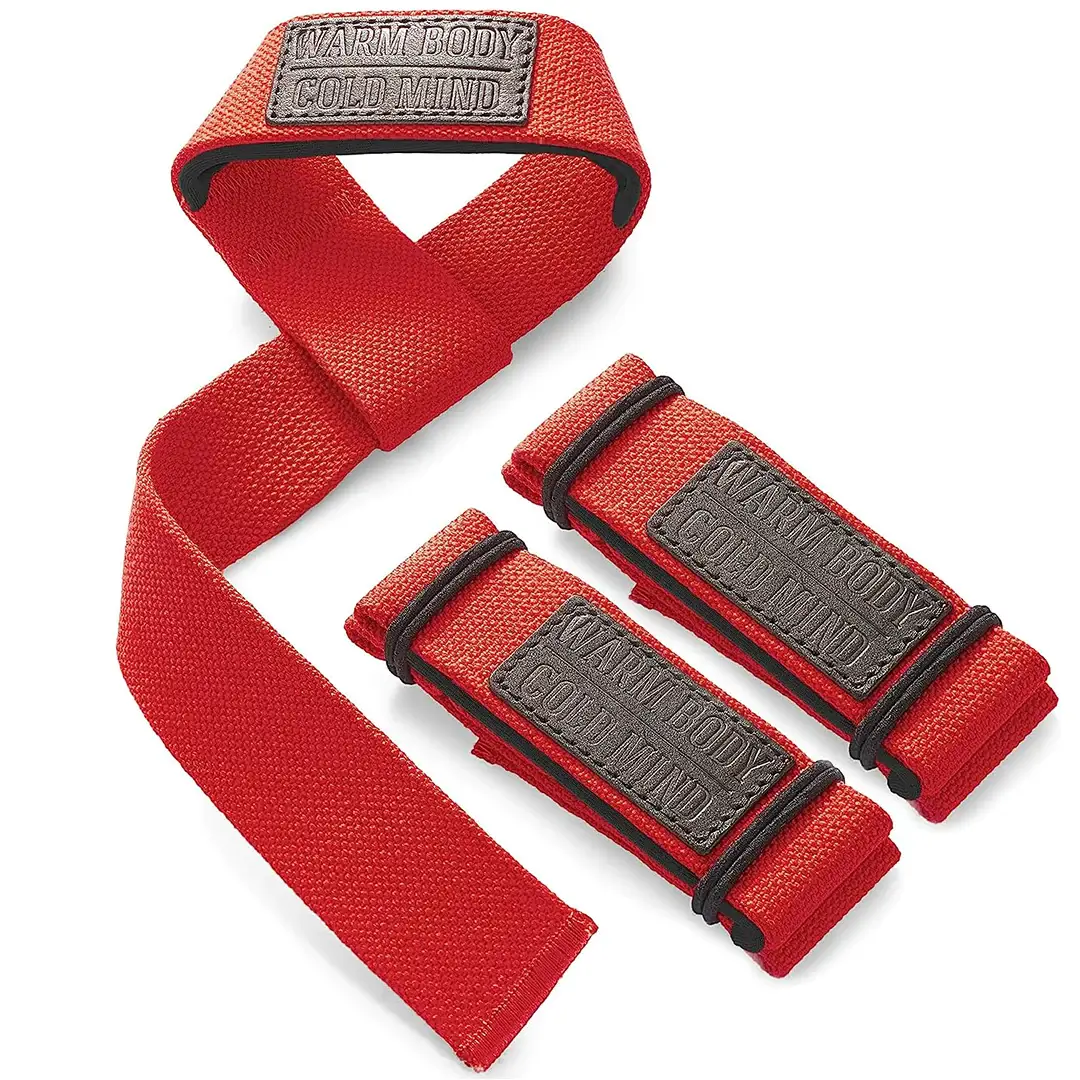
Cotton Lasso Lifting Straps Pro
Enhance your lifting experience with Warm Body Cold Mind lasso lifting straps designed for durability and comfort.
3. Segmentize Your Practice
This is especially important if you’re new to weightlifting. You want to segmentize your practice into smaller parts to train your muscle memory and feel out the exercise before you do a full attempt. For example, before you learn how to do a Clean & Jerk, you should start by learning how to clean and how to jerk separately from each other.
In the case of the front rack position, one of the best things to do is practice the proper position with the barbell mounted onto a rack. That way, you won’t feel the full weight, but you can practice rolling your shoulders, pointing your elbows, and unracking the bar from this position.
FAQ
How Long Does It Take To Improve Front-Rack Mobility?
Improving front rack mobility varies from person to person, but with consistent effort, you’ll see the first results within about 3 weeks, with major differences occurring at about 8-10 weeks of training.
How Can I Improve My Wrist Mobility For Front Rack Exercises?
The short and boring answer is to incorporate common wrist mobility drills into your workout and practice. That said, wrist exercises can be done pretty much at any time of day and don’t require any kind of special equipment. Doing some flexor and extensor stretches and wrist rotations throughout the day even on non-workout days will speed up the process.
Conclusion
And that’s how you improve your front rack mobility. Insufficient mobility in the upper body, particularly the wrists, elbows, and shoulders can make popular weightlifting exercises uncomfortable at first.
However, by incorporating the recommended front rack mobility exercises as part of your regular workout routine, you’ll see improvement within a few weeks. Remember to segmentize your practice and set aside time for mobility drills even on days when you’re not weightlifting.
Now we’d like to hear from you. Let us know which area of the front rack is causing you trouble and which exercises you’re looking forward to trying to improve your mobility. Also, if you want more related fitness content, make sure to give us a follow on the linked social media pages.
References:
- José M. Oliva-Lozano, José M. Muyor, “Core Muscle Activity during Physical Fitness Exercises: A Systematic Review,” International Journal of Environmental Research and Public Health vol. 17, no. 12 (2020), 4306.
- Joshua A. Waxenbaum, Vamsi Reddy, Bennett Futterman, “Anatomy, Back, Thoracic Vertebrae,” StatPearls [Internet] (Treasure Island, FL, StatPearls Publishing, 2024).
- Phil Page, “CURRENT CONCEPTS IN MUSCLE STRETCHING FOR EXERCISE AND REHABILITATION,” The International Journal of Sports Physical Therapy vol. 7, no. 1 (2012), 109-119.
- Susan H. Jeno, Matthew Varacallo, “Anatomy, Back, Latissimus Dorsi,” StatPearls [Internet] (Treasure Island, FL, StatPearls Publishing, 2024).
- “Wrist Sprain” – WebMd https://www.webmd.com/fitness-exercise/wrist-sprain (accessed Mar. 10, 2024).
- “Wrist Tendonitis” – Cleveland Clinic https://my.clevelandclinic.org/health/diseases/22196-wrist-tendonitis (accessed Mar. 10, 2024).
- All photos are made by WBCM Media team.
Author: Sergii Putsov
PhD in Sport Science, Olympic weightlifting, Strength & Conditioning coach and fitness expert
Sergii Putsov is a professional weightlifter with over 20 years of experience and multiple national medals. He was a member of the National weightlifting team, competing in the 94 kg weight class. Sergii holds a master’s degree in Olympic & Professional Sport Training and a Ph.D. in Sport Science. After his athletic career, Sergii transitioned into coaching and is now responsible for designing training programs, writing blog articles, providing live commentary for international weightlifting competitions, and hosting sport and fitness seminars worldwide.