10 Best Deadlift Progressions From Newbie To Pro
Deadlifts are a powerful exercise, but they have a steep learning curve. Deadlift progression can be difficult, especially without a qualified coach giving you pointers. If you’re training without prior experience, this guide will help you get the hang of the exercise fast and safely. You can think of it as a deadlift progression program from beginner to advanced. Let’s begin.
Start your deadlift progression with technique basics like hip hinge and bracing. Progress to easier variations like the kettlebell deadlift and rack pull, then give the conventional deadlift a try. Once mastered, continue your deadlift progress with advanced variations like the RDL or Sumo.
3 Benefits Of Deadlift Progressions
Here are some benefits that go along with deadlift progression, that carry both fitness and quality-of-life improvements. These should give a bigger picture about deadlifts as an exercise, and why they’re good for everybody and not just powerlifters.
✅ Back Strength
Deadlifts primarily target the posterior chain and with it, the erector spinae, a major lower back muscle. As such, it is the premier exercise for developing strength in the lower back, which carries many quality-of-life benefits. Recent clinical reports estimate that almost 30% of the adult population experienced lower back pain in the previous 3 months, with deadlifts recommended as part of exercise rehabilitation.
A weak back, regardless of cause, is a common reason for mechanical lower back pain. Although there is limited research on the full extent of using deadlifts to relieve back pain, studies support using deadlifts in lower back pain rehabilitation under certain conditions.
So, it is possible that, if you experience occasional lower back pain, deadlifts could help, and they can certainly help you improve back strength in general. That said, it’s important not to self-diagnose unless you’re a professional. Only qualified individuals, such as doctors or physical therapists, can prescribe exercise for recovery.
✅ Mastering Compound Movement
Deadlifting is a complex exercise that challenges both your mind-muscle connection and spatial awareness. As you get better at it, you will gain a deeper understanding of how different muscles work together.
Compound movements are excellent for developing proprioception, which is the body’s ability to sense its position and movement. This will make you more confident and competent in picking up new complex exercises or athletic endeavors.
✅ Benefits Daily Life
Deadlifts are a functional movement that improves both strength and physical fitness, which can translate to other athletic or real-life activities. A stronger back and posterior chain will help with fundamental strength, improving our ability to, for example, lift, throw, and carry objects.
They also increase explosive power: a study done with football players showed that incorporating deadlifts into warm-up exercises can increase jump height, running speed, and agility.
With emphasis on gripping and pulling, deadlifts also improve our forearm and grip strength. Finally, posterior chain exercises are able to improve posture. These aspects can be improved simply by picking up and progressing through your deadlift.
10 Best Deadlift Progression Steps
Here is our chosen 10-step deadlift progression program from beginner movements to advanced technique. Note that not everybody reading is starting from the beginning and is completely new to deadlifts. The first part is beginner deadlift workout exercises, so feel free to skip ahead based on your prior experience with weightlifting.
1. Learn How To Brace – Difficulty Level 1
Before you attempt to learn the deadlift, the first thing you need to do is learn how to properly brace for taking on weight. Whether it’s a deadlift, squat, or even a daily activity like lifting a heavy box off the ground, bracing in anticipation of the load stabilizes your core.
A strong core stabilizes your spine, preventing it from misaligning and potential injuries that stem from that. If you’ve ever worked a construction or factory job or any job that requires constant lifting of heavy objects, one of the first things they teach in safety courses is how to brace.
How To Brace
- Start by standing with a fully straight back, chest up, and shoulders still
- Take a big breath through your nose and breathe into your diaphragm (stomach)
- Tighten your core muscles as if anticipating a punch to the stomach
- As you do this, make sure your upright posture does not get misaligned
- Do NOT hold your breath in while you do this, you should be able to freely breathe in and out through your nose
Feel free to segment this process step-by-step until you’ve mastered it. In the beginning, it’s more important to tick every box off the checklist than to do it quickly. Once you get the hang of it after a couple dozen tries, you’ll be able to do it in one motion, tightening your core as you breathe in.
Pro Tip:
If you want to make sure you’re breathing in correctly, place your hands on your hips and your fingers over your belly. When taking in air, there should be minimal movement from your fingers. If your fingers move outward/inward, your core is not adequately engaged and you’re expanding/contracting your abdomen too much.
2. The Hip Hinge – Difficulty Level 2
Now that you’re properly braced, it’s time to learn the hip hinge, the main movement in deadlifts. The hip hinge looks simple from the outside but there are some clear do’s and don’t. When people see that they’re supposed to bend forward, the natural instinct is to start with the torso. However, the only thing that moves during the hip hinge is the hip. Everything else remains still and straight as an arrow.
A straight back is the most important part of a successful deadlift. Leaning to the front or arching from the back creates a curve in your back. If you attempt to lift weight with a curved back, the pressure won’t be evenly distributed along the spine. This is the most common reason for overloading the back during deadlifts and getting injured.
How To Hip Hinge
- Start by standing with your feet at hip width and toes pointed slightly outward
- Brace your core (as instructed above)
- Push backward from your hips and control your torso falling forward
- As you do this, the knees should start bending slightly and pushing forward, but never past your toeline
- Keep bending forward, how much you should go will depend on your proportions and mobility
- Generally, you should bend your torso over 45 degrees, but never under 10 degrees
- Return back up in a reverse motion
Pro Tip:
How to tell if your spine is aligned during the hip hinge — grab a stick (PVC pipe, broomstick, martial arts pole) and place it on your back. The stick should have three contact points: the back of your head, the upper back between your shoulder blades, and your tailbone. Perform a hip hinge. If the stick remains straight and doesn’t lose contact with any point, you’re doing good.
3. Kettlebell Deadlift – Difficulty Level 3
With the brace and hip hinge in hand, you’re ready to try your first deadlift. Most coaches will start a beginner deadlift workout with weight using kettlebells. Kettlebell deadlifts will teach you everything you need to know about the move and test your ability to brace and hip hinge, without the instability of using a barbell.
A kettlebell’s weight is concentrated, so it’s much easier to judge your center of gravity. The grip is also narrow, so a slight weakness in one hand’s grip won’t be exposed as easily.
How To Do Kettlebell Deadlifts
- Place the kettlebell on the ground slightly in front of your feet
- Stand with your feet shoulder-width apart and point your toes slightly outward
- Bend down towards the weight with your first hip hinge
- With your elbows at shoulder width apart, grip the kettlebell with both hands
- Brace your core
- Push with your heels into the ground and extend your hips and knees to drive your torso upward, lifting the weight off the ground
- Keep rising until you stand up straight
- At the peak height of the movement, squeeze your glutes for maximum posterior chain engagement (this should drive your pelvis slightly forward)
- Exhale at the top and lower back down by performing the movement in reverse, starting with the hip hinge and then the knee bend
- Make sure you control the movement, do not let the weight drag you down (use less weight if necessary)
- Repeat for the desired number of reps
The most important thing to mind during a kettlebell deadlift is the arms. When you grip the kettlebell, keep your arms hanging naturally with a slight bend at the elbows. Don’t stretch your hands out too much because this will bend your shoulders forward. That way, you disengage muscle groups in your upper body, particularly the upper back and shoulders, losing strength and stability.
4. Rack Pulls – Difficulty Level 4
Like kettlebell deadlifts, rack pulls are another great exercise to complement the conventional deadlift progress. The movement pattern is identical, except the weight starts from a higher position. This reduces the range of motion of the exercise and thus the time spent under weight pressure.
Additionally, the elevated start eliminates the sticking point of the deadlift. The most challenging part of the deadlift is the initial lift, which demands generating significant force from the lower back to lift the weight up to knee level. With rack pulls, we initiate the lift with the bar at knee height, thereby eliminating this sticking point.
This leaves us with an exercise that is almost as efficient as the deadlift for training the posterior chain and grip, but with less exercise force felt on the back, and thus a lower chance of injury.
How To Do Rack Pulls
Before you can do rack pulls, you’ll need to find an elevated surface to place your barbell at roughly knee height. It’s preferable to have access to a power rack or squat cage that has height-adjustable safety pins or spotter arms and use this to rack your barbell. Otherwise, use any stable and elevated surface that can hold the bar at knee height. For example, a stack of weight plates or pallets.
- Start by racking the barbell
- Stand in front of the bar with your feet at hip-width, with toes pointing slightly outward
- The bar should be above your midfoot, close to touching your shins
- Bend down towards the weight with your hip hinge
- Brace your core
- With your heels on the ground, extend your hips forward and knees back to drive the weight
- Keep rising until you’re standing upright
- Near the peak, squeeze your glutes and push your pelvis up to engage the posterior chain
- Exhale, lower the weight back in a reverse motion and place it onto the holding arms or platform
- Repeat for a desired number of reps, while maintaining a controlled ascend/descend
5. Block Pulls – Difficulty Level 5
Once you get comfortable with rack pulls, the next step in your deadlift progression is the block pulls. Block pulls are in many ways the same exercise as the rack pulls, except the barbell starts slightly lower, thus moving us closer to an actual deadlift position.
Instead of starting at knee height, this time, the barbell should be placed on an elevated surface up to roughly the middle shin. This will put us somewhere in the middle of the rack pull and conventional deadlift.
How To Do Block Pulls
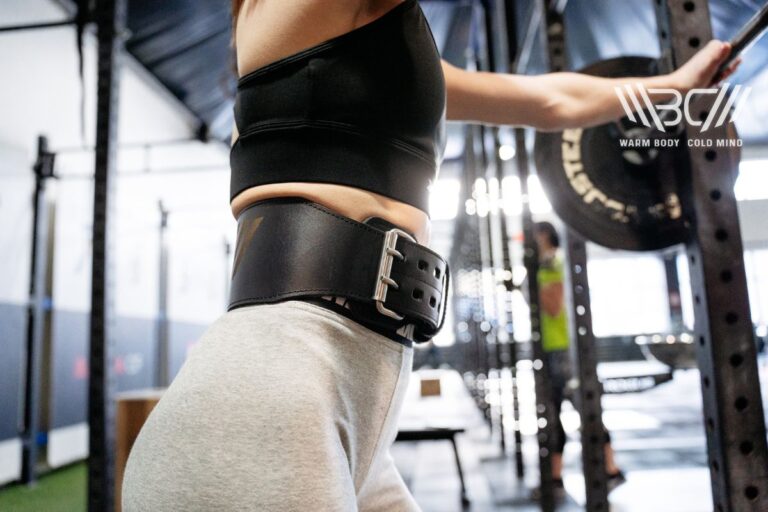
To avoid repetition, know that the same steps as rack pulls apply to block pulls, so follow the previous section’s checklist. Block pulls are also a great time to introduce a weightlifting belt. Weightlifting belts work by creating intra-abdominal pressure, stabilizing our spine, and reducing exercise forces felt on it.
While you’re still learning to deadlift, it’s best to use a nylon belt. It will provide enough stability, but is more forgiving to wear than a leather belt. Check out our Warm Body Cold Mind Nylon Weightlifting Belt. With 4 inches in width, it covers the core perfectly without digging into your hips or ribcage.
The nylon is highly flexible, perfectly catching your brace expansion, and the quick-locking quality metal clasp makes it easy to put on and off. Plus, it comes in five sizes and four color options to choose from, so anybody can find a perfect fit and style.
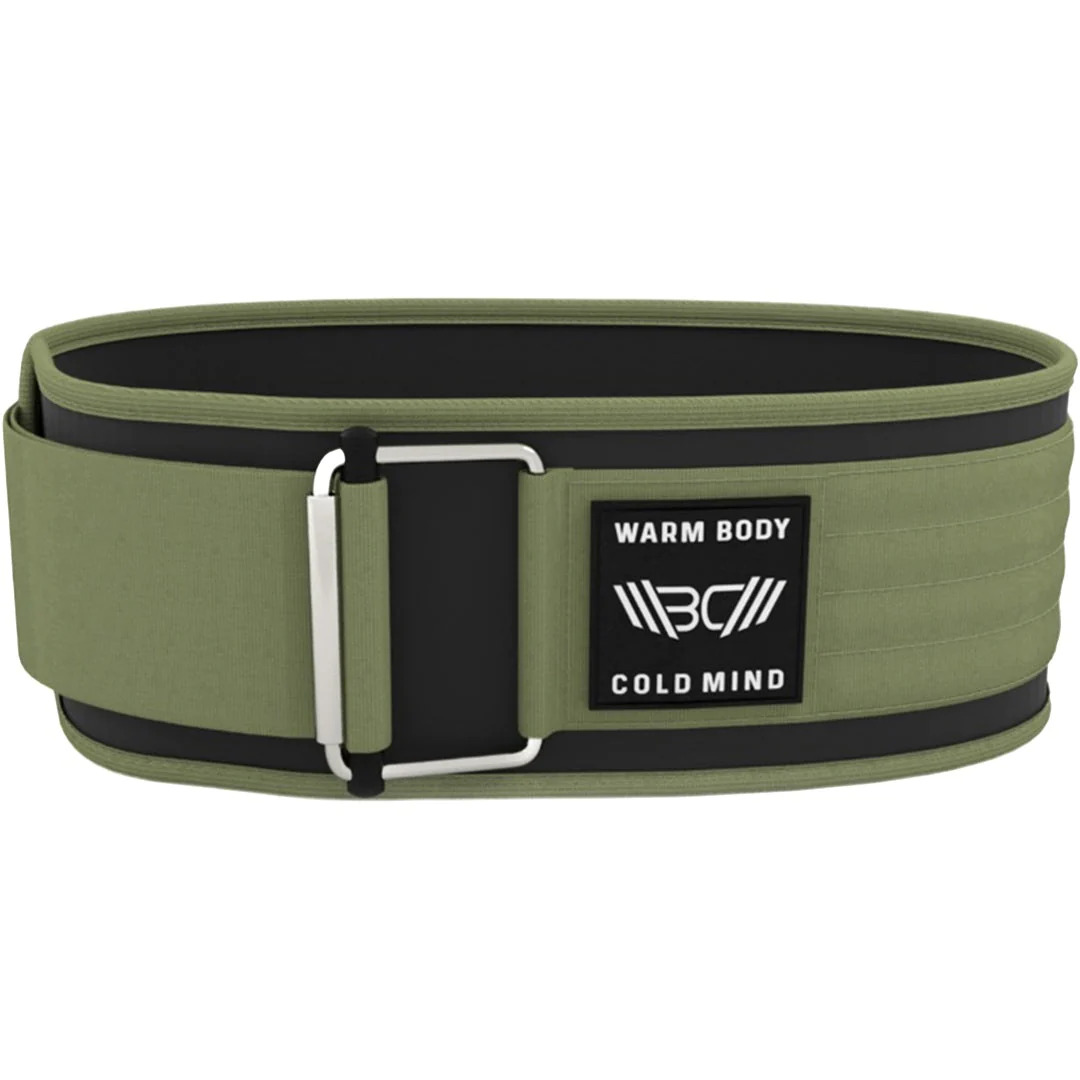
Discover the strength of the Warm Body Cold Mind nylon lifting belt. Lightweight and durable, it provides optimal support for your workouts.
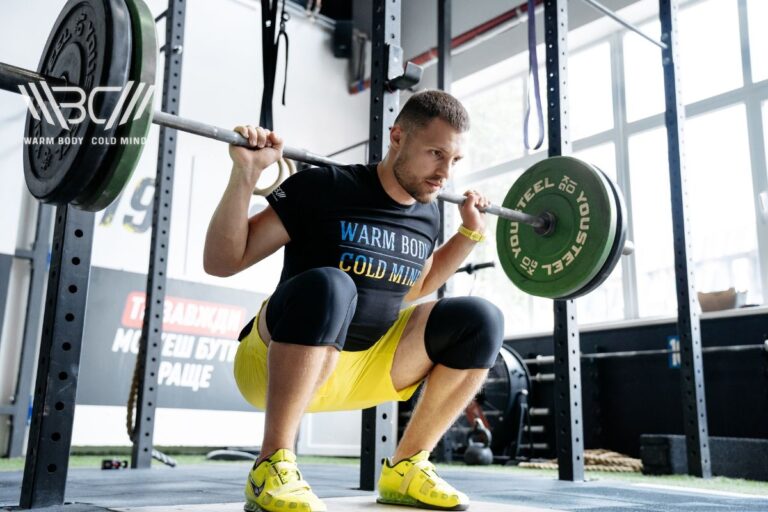
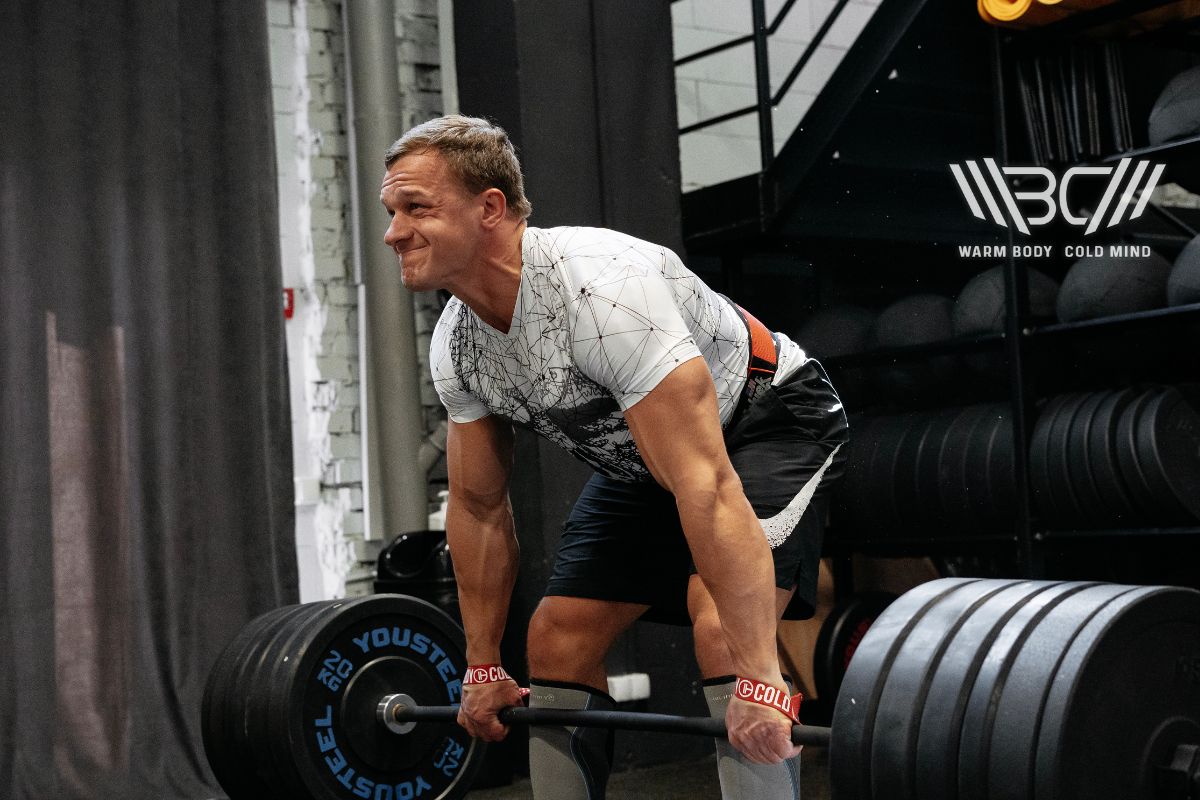
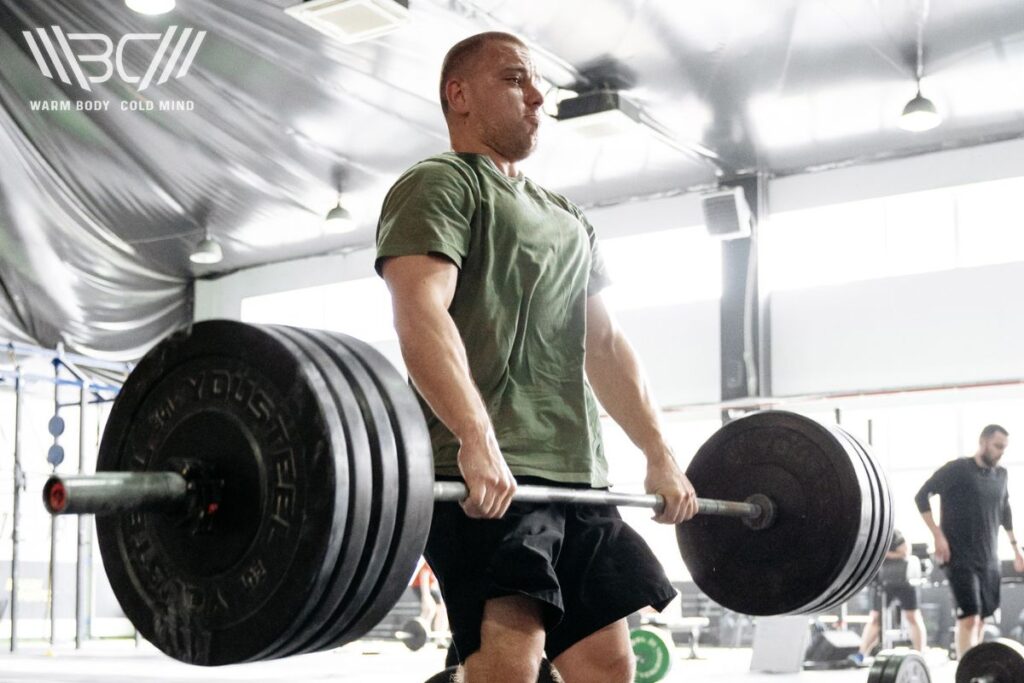
6. Conventional Deadlift – Difficulty Level 6
We’re past the midpoint of our deadlift progression program, and it’s time for the main event. Before we get into how to deadlift, it’s important to point out that many people will be able to lift more weight from rack pulls and block pulls than conventional from-the-floor deadlifting.
This is a common point of confusion so keep it in mind, it could save you from injury. Most people can rack pull roughly 30% more than they can deadlift, so don’t think your deadlift weight progression has stopped.
How To Deadlift
- Start with the barbell on the floor above your midfoot and near your shins
- Stand with your feet shoulder-width apart and toes pointed slightly outward
- Hinge down at the hips to approach the weight
- Bend down at the knees but make sure they don’t pass the line of your foot
- Grip with both arms, with your hands at shoulder width
- Brace yourself for the lift by breathing in and tightening your core
- Straighten your back and assume the starting hinged position
- Lift the weight by pushing up with your hips and back with your knees
- Keep rising until you’re standing back up
- At the height of the lift, squeeze your glutes and extend your pelvis
- Exhale and lower the bar back down in the hip hinge motion
- Repeat for a desired number of reps/sets, maintaining control on the barbell
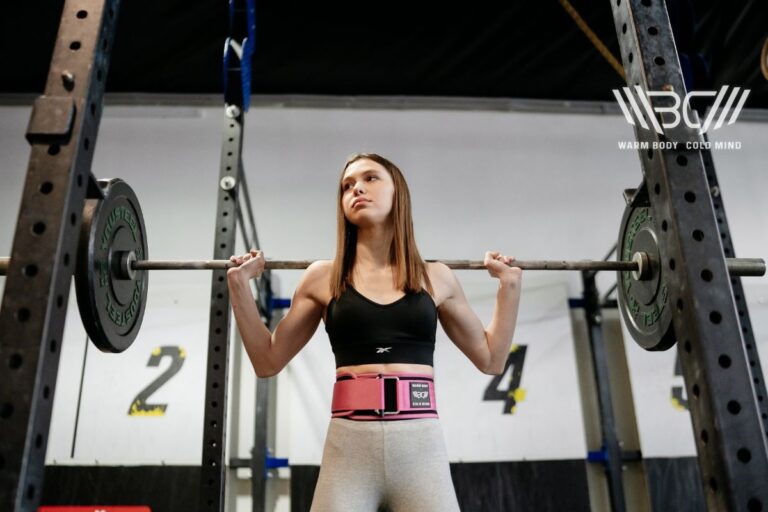
Deadlifts are the perfect time to pick up a leather weightlifting belt. Our Leather Weightlifting Belt is a standout among competitors. It’s made from high-quality genuine grade-A leather. We used a double-prong belt buckle made from stainless steel, much more durable than the typical single-prong clasp on other belts.
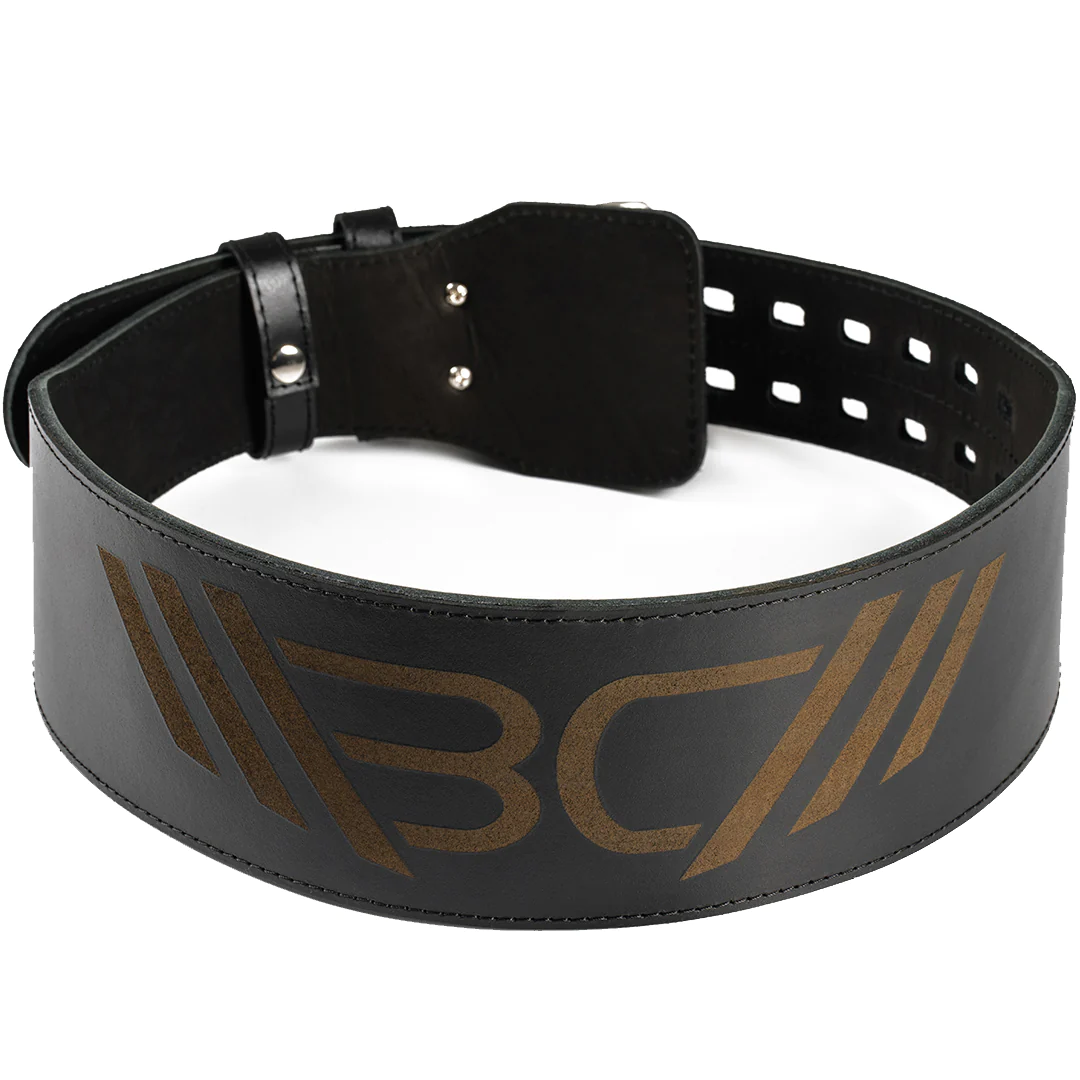
Enhance your strength training with Warm Body Cold Mind leather weightlifting belt providing exceptional support and durability.
The belt is 4” wide at the back and 6mm thick, adhering to competitive standards, with a tapered design at the front for more mobility around your front core muscles. With six sizes and 10 adjustable holes on each, athletes of all shapes and sizes will fit inside.
Pro Tip:
Maintaining grip can be an issue, especially for beginners. The bar is dragging down and rolling in your palm, and the pressure can get high. It’s perfectly normal to release and retighten your grip with each repetition when doing consecutive deadlifts. The same goes for bracing.
7. Romanian Deadlift – Difficulty Level 7
Once you’ve mastered the conventional deadlift, a good next step in your deadlift progression journey is the Romanian Deadlift, or RDL for short. The easiest way to explain an RDL, based on what we’ve talked about so far, is: the same technique as the Rack Pull, but without a platform to rest the weight on.
In the RDL, the barbell hangs freely throughout the movement, requiring continuous activity in the posterior chain and greater grip strength. This often leads people to use less weight for Romanian deadlifts compared to regular deadlifts, as the focus is on maintaining tension and control throughout multiple repetitions.
How To Do A Romanian Deadlift
Start by picking up the weight from a regular deadlift position. Once you’re standing up straight, perform the rack pull motion by hip hinging until the way is below the knees, and then rising back up. The goal is for the exercise to be repetitive, so it’s preferable to do at least 4-6 reps with heavy or 8-10 reps with medium weight for your current strength.
8. Sumo Deadlift – Difficulty Level 8
Sumo deadlifts perform much the same as conventional deadlifts, except with a different stance. As the name suggests, we’ll be taking a wider stance, imitating that of Sumo wrestlers.
Sumo deadlifts are particularly great because they drive higher muscle engagement in your lower body, but put less stress on the spine. However, the stance can be challenging for those with less hip mobility and weaker knees, which is why it’s considered harder.
How To Do The Sumo Deadlift
- Place the barbell on the ground close to your shins
- Stand with your feet slightly wider than your shoulder width
- Rotate the feet outward from the heel and point them at a 45-degree angle
- Open up your knees to the same 45-degree angle by pushing the hips forward
- Bend down towards the weight by hip hinging and bending your knees, without passing the toe line with your knee
- Grab the barbell slightly narrower than shoulder-width
- The rest is the same as your typical deadlift
Like any deadlift variation, Sumo deadlifts can be difficult to grip onto. Many lifters prefer a mixed grip with Sumo’s due to the narrow grip width. Alternatively, if you have problems with gripping, you should try using weightlifting straps. The Warm Body Cold Mind Weightlfting Straps Lasso Pro is a great choice. They’re from 100% natural soft cotton with improved stitching, these can carry up to 815 lb (370 kg).
The key feature of lasso straps is the adjustable lasso loop that can fit any wrist size perfectly. We also fitted them with a soft neoprene padding for added wrist comfort. Remember not to introduce straps too early to avoid overreliance. Save them for your maximum lifts, such as 70% of 1RM or more.
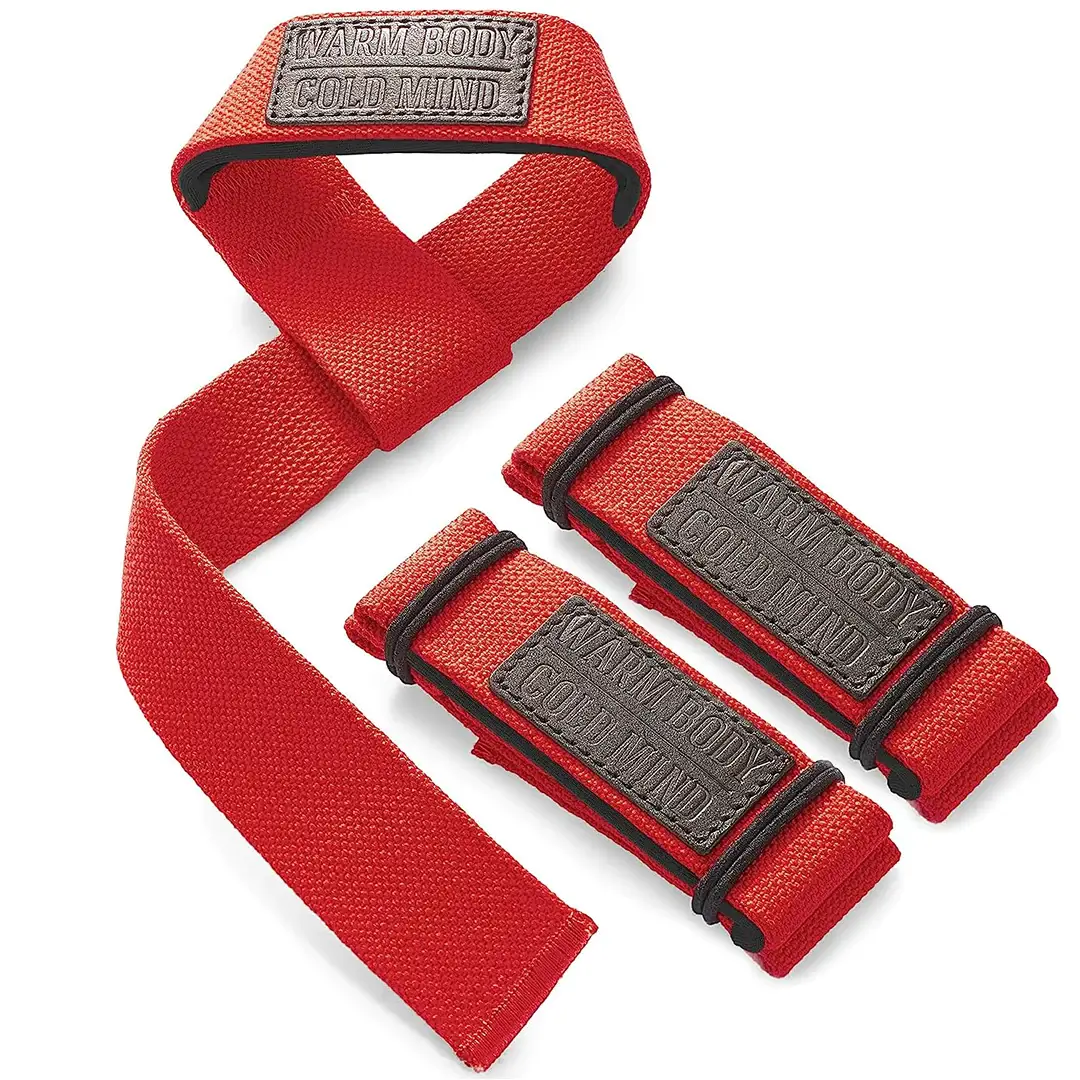
Cotton Lasso Lifting Straps Pro
Enhance your lifting experience with Warm Body Cold Mind lasso lifting straps designed for durability and comfort.
9. Progressive Overload – Difficulty Level 9
Progressive overload is not a deadlift technique, but rather a method of training. It involves gradually adding more weight as you progress through your workout sets, starting at the lowest weight in the first, and most weight at the last. This is typically done in 3-4 sets.
Progressive overload is an amazing method for deadlift weight progression, as you slowly keep adding more weight and getting accustomed to it. It systematically increases stress on muscles as fatigue sets in, driving greater muscle adaptations. Research indicates it’s best for muscle hypertrophy (growth), due to the amplified adaptations over time.
How To Do Progressive Overload
Let’s say your one-repetition maximum (1RM) deadlift is 175 lbs/80 kg and you’re doing four sets. For progressive overload, you never want to go with your absolute maximum because you’ll be tired towards the last set. Here’s an example:
- Set 1: 70% of 1RM (125 pounds or approximately 55 kilograms)
- Set 2: 75% of 1RM (135 pounds or approximately 60 kilograms)
- Set 3: 80% of 1RM (140 pounds or approximately 65 kilograms)
- Set 4: 85% of 1RM (155 pounds or approximately 70 kilograms)
10. Single Leg Deadlift – Difficulty level 10
The single leg deadlift is more of an honorable mention but it’s an exercise that should definitely be introduced into your functional fitness routine. Very few exercises train the posterior chain’s real-time adaptations, providing an amazing workout for your stability, balance, and proprioception (spacial awareness).
Single leg deadlift progression is excellent at correcting muscle imbalances between the left and right side, which is highly beneficial if you have lifestyle or injury-related differences.
How To Do A Single Leg Deadlift
- Pick up a kettlebell, dumbbell, or weight plate
- Start by standing with one leg slightly bent at the knee and the other hanging in the air next to it
- Brace your core and start the hip hinge movement
- As your torso moves down, knees bend, and hips push back, raise the back
- The back leg must remain in unison with your spine, maintaining a 180-degree angle from your head to heel (slight knee bending is allowed for balance)
- Rise back up reversing the hip hinge motion and repeat for the desired number of reps
The single leg deadlift is difficult to master unless you have prior experience or athleticism relevant to its movement. As such, it’s perfectly normal to start by holding the weight in one hand (the same as the standing leg) and balancing with the other. Once you get comfortable, you can start holding the weight with both hands or introducing two kettlebells, dumbbells, etc.
Subscribe!
Get useful tips, expert insights, and in-depth analysis of training programs & nutrition plans to get the most out of your performance.
How To Know When To Progress To A Harder Deadlift Variation?
Knowing when to progress to the next deadlift variation is all about listening to your body and paying attention to your form. Training in front of a mirror is like having a cheat code – it helps you spot any mistakes and correct your form and technique on the fly.
However, it only gives you a front-facing view. So, if possible, get feedback from a qualified coach. But if not, try recording yourself from different angles and inspect those videos for mistakes.
You can also share with a fitness community you trust, such as ours, where experts can give you some great pointers. The key is to move on to the next level when you feel confident in your form and strength. However, don’t rush your deadlift progression. It’s also worth noting that you shouldn’t introduce new exercises just because they’re “harder” unless you’re sure they’ll benefit your workout goals specifically.
Conclusion
That was deadlift progression in a nutshell. If there’s one key takeaway about deadlifts, it’s that mastering technique is the most important part. Deadlifts can be quite rewarding but are also notorious for injuries. Keep in mind that not everybody will progress at the same pace, so don’t feel discouraged if you feel stuck, but also don’t rush to move on to the next phase.
We’d love to hear from you as well. Tell us at which part of your deadlift progress you’re currently at. Also, what current deadlift goal have you set up for yourself? Leave a comment and join in on the discussion and remember to check out our social media pages for similar fitness content.
References:
- Brad Gillingham, Alan Bishop, Grant K. Higa, Kent J. Adams, Mark DeBeliso, “The Relationship Between Partial and Full Range of Motion Deadlift 1-Repetition Maximum: A Technical Note,” The Journal of Strength and Conditioning Research vol. 37, no. 4 (2023), 909-914.
- Chee-Hoi Leong, Cassandra Forsythe, Zachary Bohling, “Posterior chain and core training improves pelvic posture, hamstrings-to-quadriceps ratio, and vertical jump performance,” The Journal of Sports Medicine and Physical Fitness vol. 61, no. 1 (2024), 7-15.
- E. A. Harman, R. M. Rosenstein, P. N. Frykman, G. A. Nigro, “Effects of a Belt on Intra-Abdominal Pressure during Weightlifting,” Medicine & Science in Sports & Exercise 21, no. 2 (1989), 186-90.
- “Erector Spinae” Physiopedia https://www.physio-pedia.com/Erector_Spinae (accessed Mar. 14, 2024).
- Lars Berglund, Björn Aasa, Jonas Hellqvist, Peter Michaelson, Ulrika Aasa, “Which Patients With Low Back Pain Benefit From Deadlift Training?” The Journal of Strength & Conditioning Research vol. 29, no. 7 (2015), 1803-1811.
- Samuel C. Fischer, Darren Q. Calley, John H. Hollman, “Effect of an Exercise Program That Includes Deadlifts on Low Back Pain,” Journal of Sport Rehabilitation vol. 30, no. 4 (2021), 672-675.
- All photos are made by WBCM Media team.
Author: Sergii Putsov
PhD in Sport Science, Olympic weightlifting, Strength & Conditioning coach and fitness expert
Sergii Putsov is a professional weightlifter with over 20 years of experience and multiple national medals. He was a member of the National weightlifting team, competing in the 94 kg weight class. Sergii holds a master’s degree in Olympic & Professional Sport Training and a Ph.D. in Sport Science. After his athletic career, Sergii transitioned into coaching and is now responsible for designing training programs, writing blog articles, providing live commentary for international weightlifting competitions, and hosting sport and fitness seminars worldwide.